Homemade Baking design inspiration
Build a sourdough starter from scratch in seven days with just flour and water, then bake a tangy loaf with a crackly crust and open crumb.
A sourdough starter is just flour and water left out until wild yeast moves in. Nothing else. Two ingredients, one jar, seven days.
Most starters fail for the same reason: the kitchen is too cold, or the feeding gets skipped. Keep the jar between 70F and 80F and feed it on schedule, and it will rise.
This guide walks you through the full week, then turns that starter into a round loaf with a dark crust and a soft, holey middle.
About the Ingredients
1 cup (120g) whole wheat flour, for day one
Whole wheat carries more wild yeast on the grain, so it kicks off faster than white. If you only have all-purpose, use it and add one extra day to the timeline.
1 cup (240g) lukewarm water, 75F to 80F, for day one
Tap water is fine in most places. If yours smells strongly of chlorine, leave a jug out overnight and the chlorine off-gasses.
3 1/2 cups (420g) all-purpose flour, for daily feedings
Bread flour gives a chewier loaf later. All-purpose is more forgiving for a first starter and works fine.
3 1/2 cups (840g) lukewarm water, for daily feedings
Keep the water at room temperature. Cold water slows the yeast and stretches the whole week out.
3 cups (360g) bread flour, for the loaf
Bread flour has more protein, which holds the gas bubbles. If you swap in all-purpose, the loaf will spread a little more.
1 1/2 cups (360g) water, for the loaf
Room temperature again. Warm water above 100F can kill the yeast you spent a week growing.
1 1/2 teaspoons (9g) fine sea salt, for the loaf
Salt goes in after the rest, never with the starter. Direct contact slows the rise. Kosher salt works, but use a little more by volume.
Step-by-Step Instructions
1. Mix day one
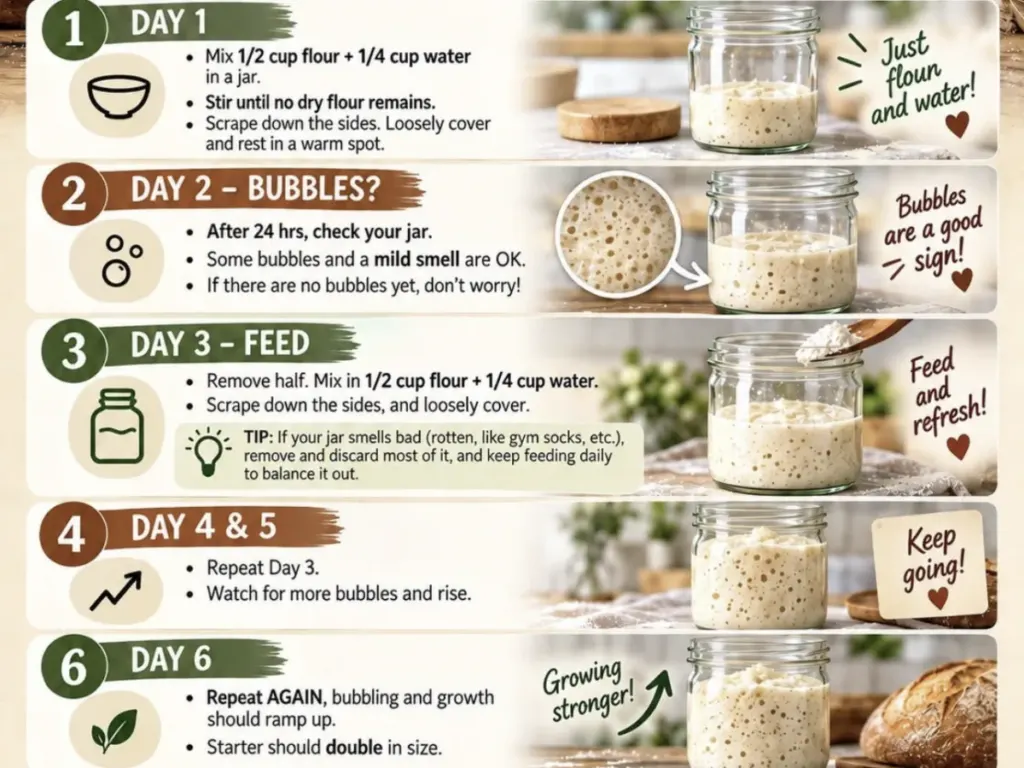
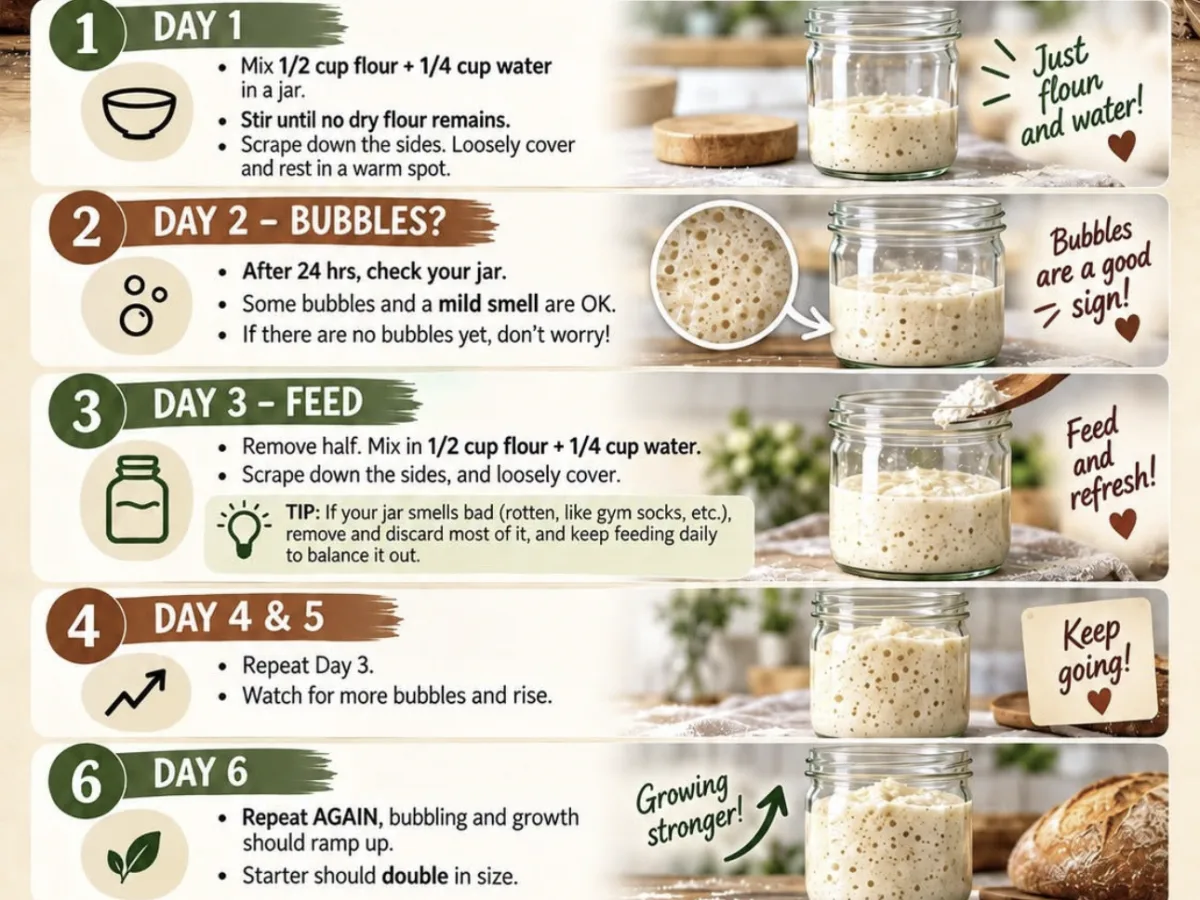
Stir the whole wheat flour and 1 cup of lukewarm water in a glass jar until no dry patches remain. Scrape the sides down, cover loosely, and leave it on the counter at 70F to 80F for 24 hours.
2. Feed days two and three
Pour off half the starter, then stir in 1/2 cup all-purpose flour and 1/2 cup lukewarm water. Do this once a day. By day three you should see a few small bubbles and smell something faintly sour.
3. Feed twice daily
From day four, feed every 12 hours: discard half, then add 1/2 cup flour and 1/2 cup water. The starter should double in 4 to 6 hours and smell like yogurt. If it does not, move the jar somewhere warmer.
4. Test for readiness
Drop a spoonful into a glass of water. If it floats, it is ready to bake. If it sinks, feed it twice more and test again the next morning.
5. Mix the dough
Stir 1/2 cup of active starter into 1 1/2 cups water in a large bowl. Add the bread flour and mix until shaggy. Cover and rest 45 minutes. Then sprinkle the salt over the top and squeeze it through with wet hands until the dough feels smooth.
6. Bulk rise and fold
Cover the bowl and let the dough rise at room temperature for 3 to 4 hours, until it looks puffy and jiggly. Every 45 minutes, wet your hand, lift one side of the dough, and fold it over the middle. Four folds total.
7. Shape and cold proof
Turn the dough onto a floured counter, shape it into a tight round by dragging it toward you, and place it seam side up in a floured bowl. Cover and refrigerate 12 to 16 hours.
8. Bake in a Dutch oven
Heat the oven and a covered Dutch oven to 475F (245C) for 45 minutes. Tip the dough into the hot pot, score the top with a knife, cover, and bake 20 minutes. Uncover and bake 20 to 25 more minutes, until the crust is deep brown and the loaf sounds hollow when tapped. Cool on a rack 1 hour before slicing.
Tips & Tricks
- If a dark liquid pools on top, that is alcohol, not mold. Pour it off and feed the starter twice a day instead of once.
- A starter that smells like nail polish remover is hungry. Feed it and it settles down within two feedings.
- Pink or orange streaks mean throw it out and start over. No amount of feeding fixes that.
- Mark the jar with a rubber band at the starting level. Doubling is easy to see and hard to guess.
Pro Tips
Delicious Variations
Rye starter
swap half the all-purpose flour in the daily feedings for rye. It ferments faster and tastes sharper.
Same-day loaf
use 1 cup of starter instead of 1/2 cup and skip the cold proof. The crumb is tighter but you bake the same day.
Olive and rosemary loaf
fold 3/4 cup chopped olives and 1 tablespoon chopped rosemary into the dough during the second fold.
How to Store Homemade Baking design inspiration
Refrigerator
Once the starter is active, store it in the fridge and feed it once a week. Let it sit out 4 hours after feeding before it goes back in.
Freezer
Spread 1/4 cup of starter thin on parchment, freeze solid, then break it into flakes and bag it. It keeps a year. Thaw and feed it twice to wake it up.
Reheating
Refresh a cold starter by feeding it twice a day at room temperature for 2 days. It is ready when it doubles in 6 hours.
Frequently Asked Questions
Q: How do I know my sourdough starter is ready to bake with?
It doubles in size within 6 hours of feeding and floats in a glass of water. It should smell like plain yogurt, not acetone. If it only rises a little, feed it twice a day for two more days.
Q: Can I make a sourdough starter with just all-purpose flour?
Yes, and it works fine, but expect it to take 8 or 9 days instead of 7. Whole wheat or rye flour on day one speeds things up because the bran carries more wild yeast. Once it is going, all-purpose keeps it alive.
Q: Why did my starter stop rising after day three?
That lull is normal. The first burst of bacteria dies back before the yeast takes over. Keep feeding twice a day and it usually picks up again by day five. Moving the jar somewhere warmer than 70F helps too.
Q: Do I have to discard starter every time I feed it?
Yes, or the jar overflows and the food-to-yeast ratio gets too thin to rise. Keep the discard in a covered container in the fridge and use it for pancakes, waffles, or crackers within two weeks.
Q: How long does a sourdough starter last in the fridge?
Months, as long as you feed it once a week. If it sits longer than a month, pour off any dark liquid, feed it twice a day at room temperature, and it usually comes back within two days.
Start the jar tonight with flour and water, and by this time next week you will have bread. One jar, one bowl, one pot to wash. Dinner's done. Go put your feet up.
Homemade Baking design inspiration Recipe
Build a sourdough starter from scratch in seven days with just flour and water, then bake a tangy loaf with a crackly crust and open crumb.
🧂 Ingredients
- 1 cup (120g) whole wheat flour, for day one
- 1 cup (240g) lukewarm water, 75F to 80F, for day one
- 3 1/2 cups (420g) all-purpose flour, for daily feedings
- 3 1/2 cups (840g) lukewarm water, for daily feedings
- 3 cups (360g) bread flour, for the loaf
- 1 1/2 cups (360g) water, for the loaf
- 1 1/2 teaspoons (9g) fine sea salt, for the loaf
📋 Instructions
- 1Mix day one — Stir the whole wheat flour and 1 cup of lukewarm water in a glass jar until no dry patches remain. Scrape the sides down, cover loosely, and leave it on the counter at 70F to 80F for 24 hours.
- 2Feed days two and three — Pour off half the starter, then stir in 1/2 cup all-purpose flour and 1/2 cup lukewarm water. Do this once a day. By day three you should see a few small bubbles and smell something faintly sour.
- 3Feed twice daily — From day four, feed every 12 hours: discard half, then add 1/2 cup flour and 1/2 cup water. The starter should double in 4 to 6 hours and smell like yogurt. If it does not, move the jar somewhere warmer.
- 4Test for readiness — Drop a spoonful into a glass of water. If it floats, it is ready to bake. If it sinks, feed it twice more and test again the next morning.
- 5Mix the dough — Stir 1/2 cup of active starter into 1 1/2 cups water in a large bowl. Add the bread flour and mix until shaggy. Cover and rest 45 minutes. Then sprinkle the salt over the top and squeeze it through with wet hands until the dough feels smooth.
- 6Bulk rise and fold — Cover the bowl and let the dough rise at room temperature for 3 to 4 hours, until it looks puffy and jiggly. Every 45 minutes, wet your hand, lift one side of the dough, and fold it over the middle. Four folds total.
- 7Shape and cold proof — Turn the dough onto a floured counter, shape it into a tight round by dragging it toward you, and place it seam side up in a floured bowl. Cover and refrigerate 12 to 16 hours.
- 8Bake in a Dutch oven — Heat the oven and a covered Dutch oven to 475F (245C) for 45 minutes. Tip the dough into the hot pot, score the top with a knife, cover, and bake 20 minutes. Uncover and bake 20 to 25 more minutes, until the crust is deep brown and the loaf sounds hollow when tapped. Cool on a rack 1 hour before slicing.